In the previous 2 posts of this series, we have seen how we can utilize Dynamics 365 Fin Ops OOTB tools like data templates, data task automation to migrate configurations and also utilize LCS as a centralized repository for all the data packages management. In case you have missed them below are the links:
Driving a successful implementation using Dynamics 365 Fin Ops tools – 1
Driving a successful implementation using Dynamics 365 Fin Ops tools – 2
In this blog post, let us review about Regression Suite Automation Tool or RSAT and how this can help drive a successful implementation.
What is RSAT ?
RSAT is a automated testing tool that will allow organizations/implementation partners to automate testing their business processes whether custom or standard. RSAT is very useful for below cases/reasons:
- You have custom code, with multiple regions using the same code base and also following incremental development or CI/CD methodology. In this case you need to ensure none of your recent changes are affecting the existing and/or standard Dynamics 365 Fin Ops functionality. This can be done having all your test plans, test suites and test cases for the features/functionalities embedded in RSAT.
- Since there are incremental product releases by Microsoft in the Dynamics 365 space, having all your test repository defined in RSAT also ensures that none of your custom code is broken when the incremental updates i.e., Platform updates are applied.
In the previous versions of Dynamics AX, automated testing was a challenge, as there were very few partners that could support automated testing for the Dynamics AX applications. With RSAT being a readily available to use tool with Dynamics 365 Fin Ops, this gives opportunities to be able to define and automate all the test cases.
Installation of RSAT:
There are certain prerequisites to be able to use RSAT.
- Access to Azure Devops: This is backbone of RSAT to be able to execute as all the test suite will be saved in Azure Devops.
- Microsoft Excel: All the parameters for the test cases would be saved in an excel file and in case if you need to edit them.
- Dynamics 365 Fin Ops Test environment: This is so that RSAT can be connected to it to be able to run the test suite that you build.
- Selenium browser drivers: Selenium is an open source software that is used for automating tests that for web based applications. Since Dynamics 365 Fin Ops is a web based application, Selenium is required to be able to execute the tests. You can read more in depth about Selenium here.
Downloadable links for RSAT and Selenium drivers:
Before installing RSAT, you need to define your Test suite, Test plan and Test cases in Devops. This is assuming that you are already utilizing Devops for maintaining your backlog and have a project created in Azure devops. At a high level, test plans can be something specific to a module, if you are working with cross teams. For example, you may choose to have test plan for Procure to Pay, Order to Cash etc., Within these test plans, you can choose specific different business specific scenarios as test suites. For example, in case of Procure to Pay, you can create the test suite within this by direct material procurement and indirect materials (routed via Purchase requisitions). Test cases within the test suite can determine each functionality, like Purchase order creation, Product receipt, Invoicing etc., While all said and done, these are totally up to the customer and partner’s choice on how granular they would like to go into.

Pictorially this is how test plan – test suite – test cases relation would look like.

Once you have your project, test plan, test suite and test cases setup, the next step would be to connect the RSAT tool to Azure devops and also to D365 Fin Ops.
In the settings of the RSAT tool you need to specify the devops URL, an access token and also the project, test plan.


If all the settings are right, when you click on Test Connection, you should be able to see a success message.

Once Azure devops is connected, you need to specify the test environment of Dynamics 365 Fin Ops URL in the hostname. Note that the URL should be without https or any ‘/’ at the beginning or at the end.
SOAP hostname should just be hostname as mentioned above along with the key word soap appended into the first part of the host name.
Provide the Admin user name that will run the tests.
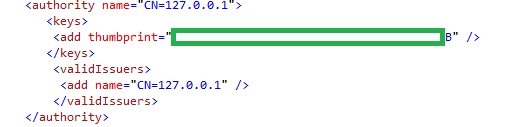
Thumbprint is required to be entered in the wif file, which I would walk through in a minute from here. If it is blank click on New to generate one.
Set the default company which the test case would be executed in.

Once the thumbprint is generated, this needs to be entered in the WIF config file of the test environment. To do so, you need either a remote desktop access or log a ticket with Microsoft if you do not have remote desktop access.
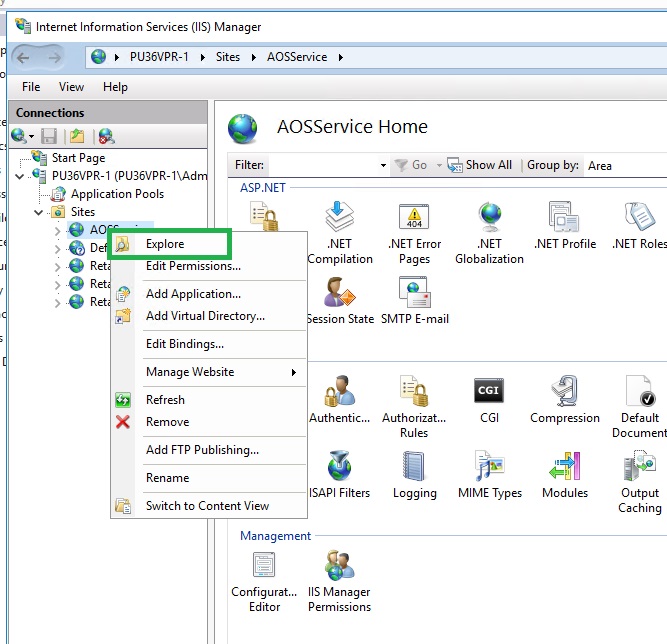
If you have remote desktop access, copy the thumbprint, open IIS (Internet information services), expand the sites, right click on “AOSService” and click on “Explore”.
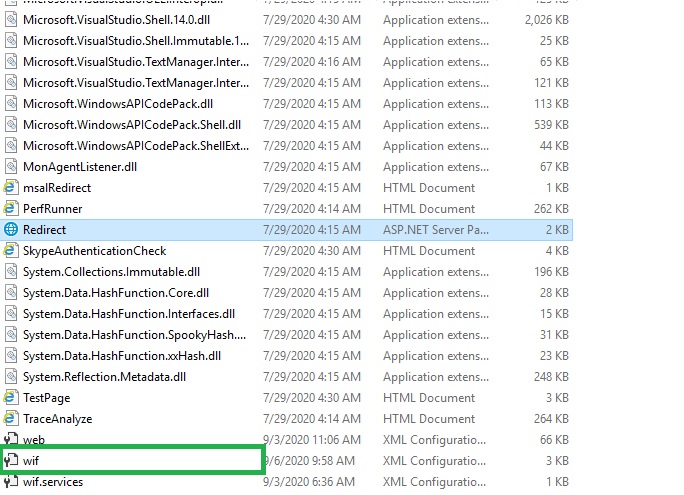
In the folder explorer that opens up, find the WIF config file and add the below lines.
Tip: Backup the original WIF file, before making the change. This is to ensure that you will be able to recover in the event if this causes issues with the environment.
Setup a working directory where all the parameter files will be saved and also the default browser that will be used to execute the tests by the tool. Recommended browser is Microsoft Edge.
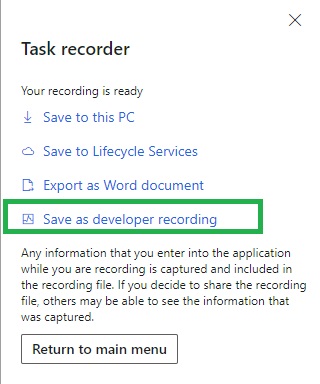
Now that we have all our prerequisites in place, the next step is to have a task recorder and that being attached to our test case. Note that the task recorder should be of type developer recording when you are saving it, which is basically an XML file.
In the test case, now attach this developer recording.

Tip: Keep the test case name and the task recording name the same.
Once all these steps are done, next is to execute the test case in RSAT. Before executing the tests, we need to Load the test plan, test suite and the related test cases.
Once loaded, you will see the test suite, and its test cases appearing.

The next step would be to generate the parameter and the test execution files.
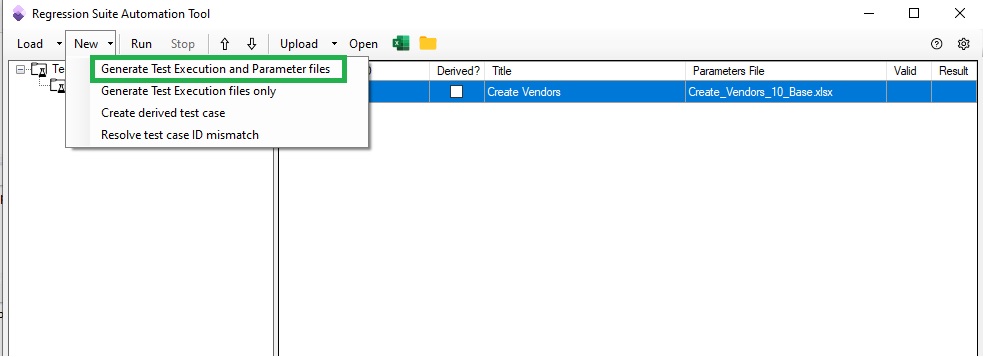
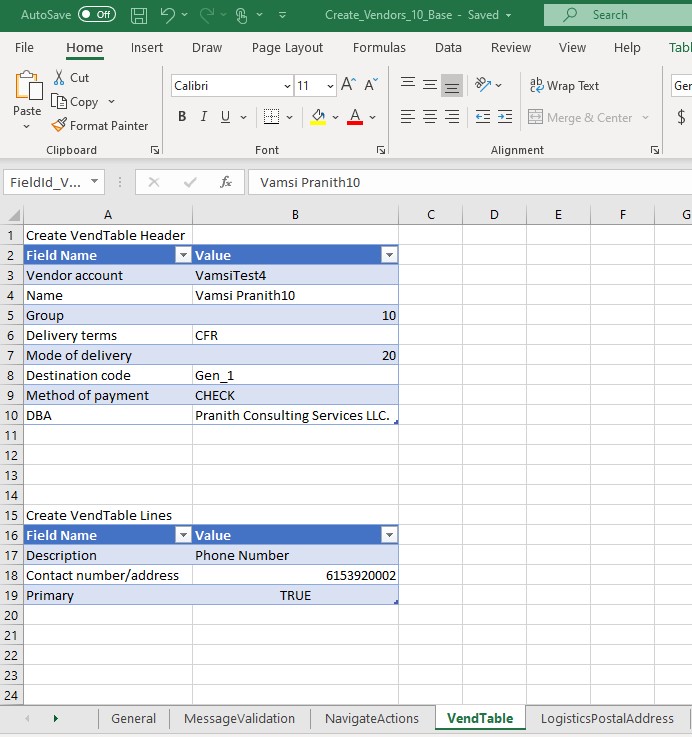
The parameter file is important as it allows you to change the parameters for each test execution. In this example, the vendor name, which is a parameter, that can be changed. You can also change other parameters like vendor group, etc., Here is how my parameter file looks like and I have changed a few details in it.
Now that we have all the details ready, let us try to run a test using the details that we have.
I click on “Run” from the RSAT tool and you would see a new browser opening up that runs this one test case, with a note that says that the browser is being controlled by automated test software.

And once the execution is complete, you can see a green checkbox in the RSAT tool against the Result column.

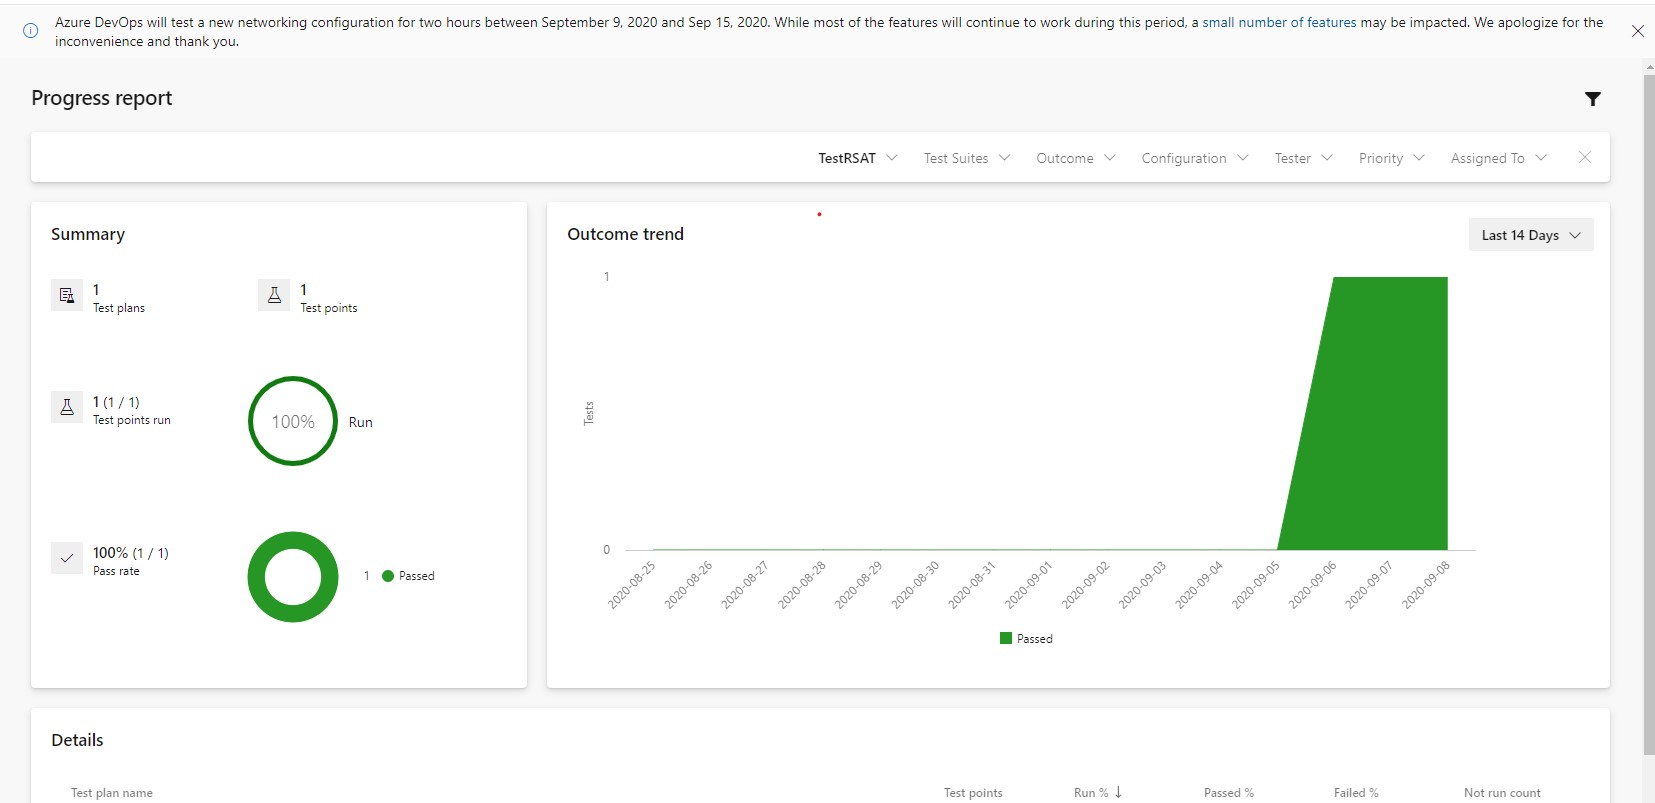
You can monitor your testing progress under Azure devops as well. It looks all green right now, but reality may be different :).
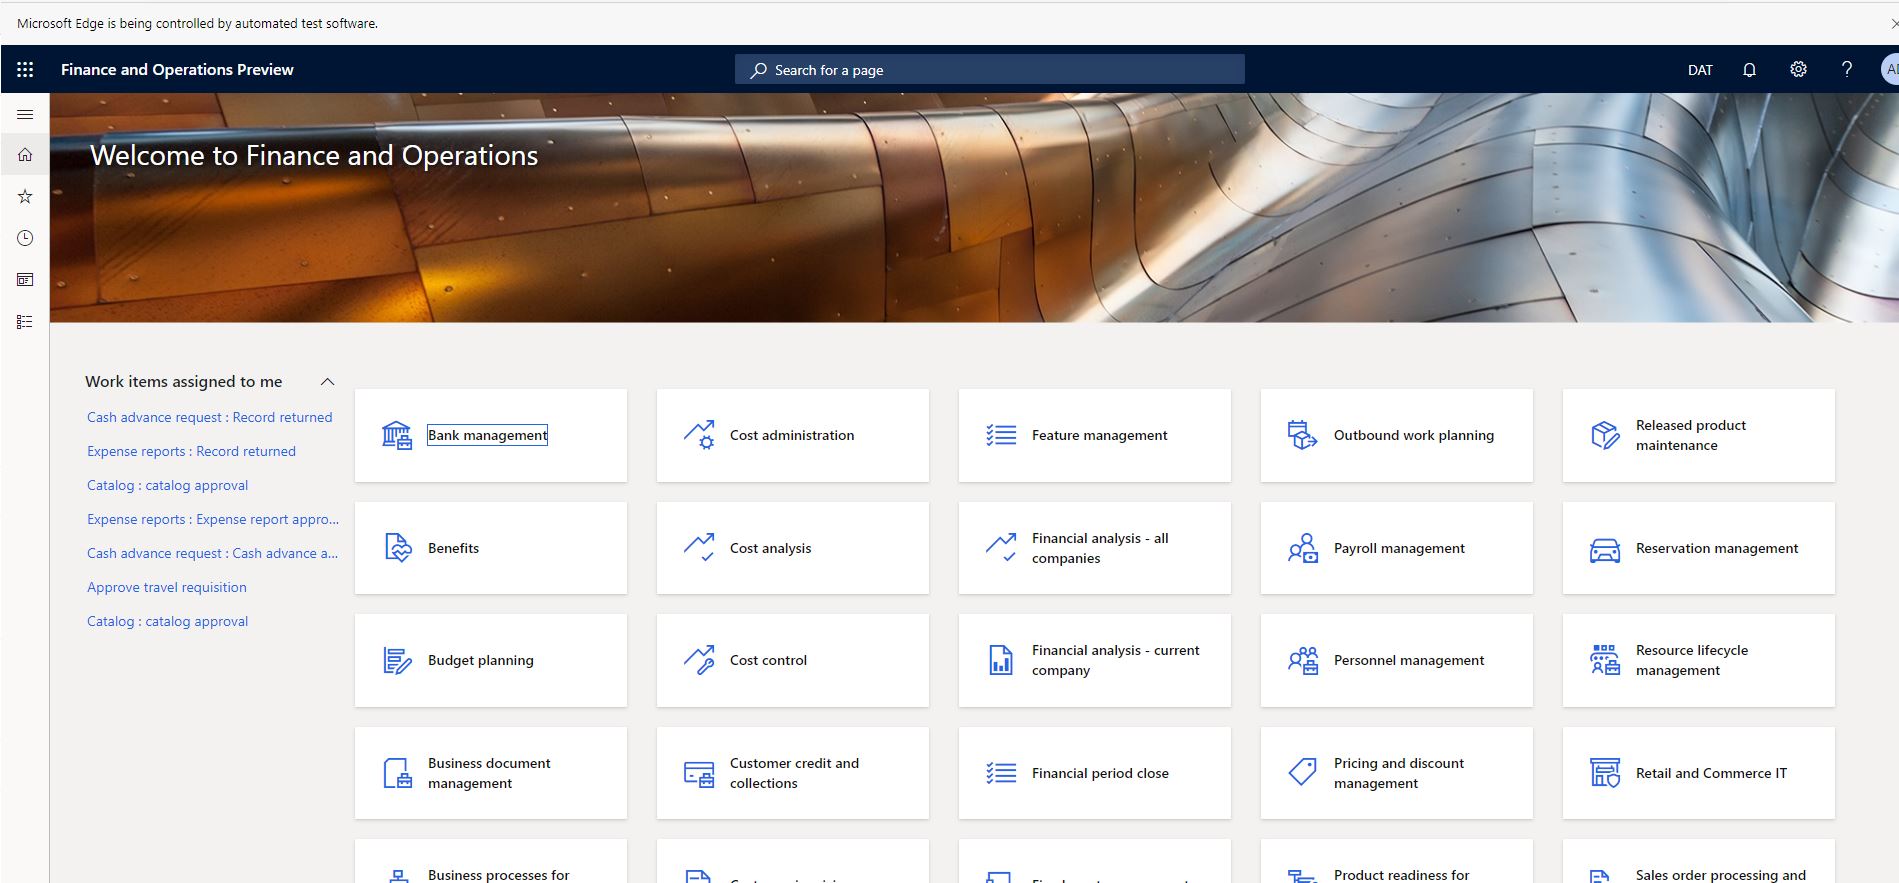
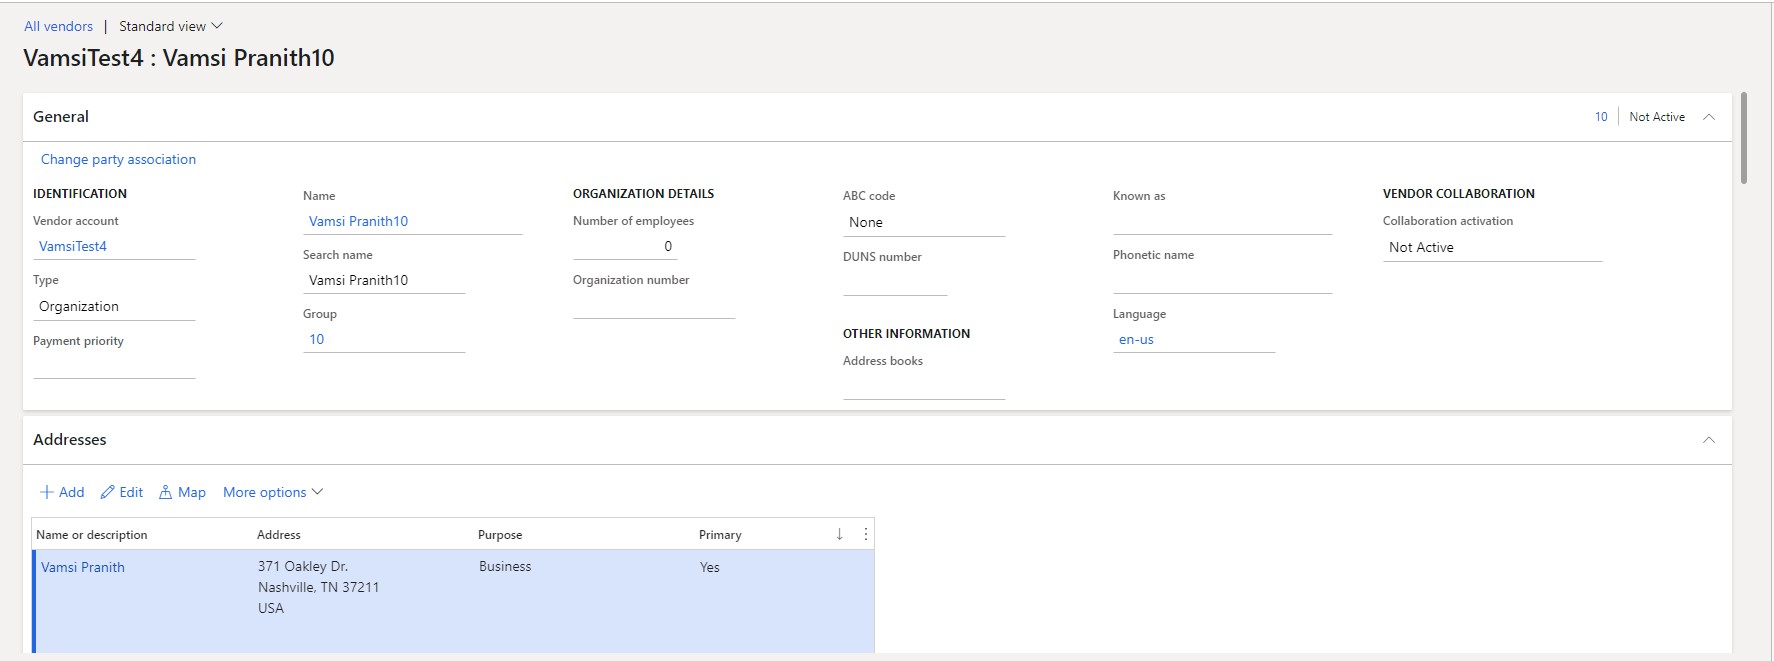
And you can also see the vendor being created in Dynamics 365 Fin Ops according to the details provided in the parameter file.
To end this post, we have understood:
- How to install RSAT
- How RSAT can help in running automated tests for you and mitigate the challenges of regression and otherwise automated testing as well.
- How Azure devops can be utilized as a test repository without having the need to rely on third party applications.
- And finally how seamlessly all these applications are interconnected with Dynamics 365 Fin Ops.
I know you must have more questions about RSAT. I will be covering that in another blog series, hopefully soon. Stay tuned.
This marks the end of this blog series. I hope you have enjoyed the content. Please share the posts, if you like my content. That encourages and helps me to provide more quality content to the ever growing Dynamics 365 Fin Ops space.
Happy D365’ing!!
